
Compressed air plays an important role in many fields and industries, but when it comes to scuba diving, high-quality, breathable compressed air is critical. For this reason, all divers should understand how a diving air compressor works, plus how to maintain it and perform basic repairs.
If you’re new to diving or are interested in taking up the sport, we will provide you with a useful overview of scuba dive compressors and some handy maintenance tips.
Differences Between Regular Air Compressors vs. Scuba Air Compressors
You cannot use a regular air compressor for scuba diving, as it differs significantly from models designed for underwater use. A scuba compressor is a high-pressure air compressor system designed to fill the tank that a diver uses to breathe underwater. This type of compressor also supplies air for firefighters and the oxygen tanks you find in hospitals.
Scuba compressors differ from regular air compressors in two primary ways:
1. Pressure
A scuba tank generally must be filled at very high pressures, roughly 3,000 pounds per square inch (psi). Regular air compressors can only provide a small fraction of this pressure.
2. Quality
Compressed air for scuba diving must be clean. Air compressors for scuba diving, unlike most other types of compressors, are designed to provide breathable, clean air, as contaminated air could lead to serious health problems or even death. It is safe to breathe air from a scuba compressor as long as it is filtered appropriately.
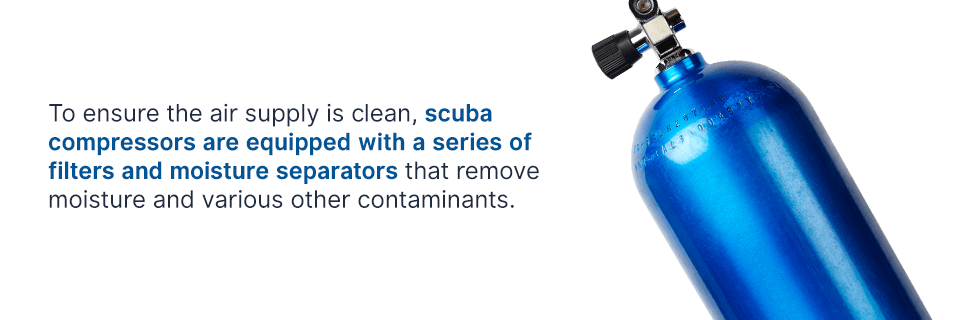
To ensure the air supply is clean, scuba compressors are equipped with a series of filters and moisture separators that remove moisture and various other contaminants. Once the moisture is removed, the compressed air then goes through a series of activated carbon filters that remove numerous hydrocarbons and render carbon monoxide (CO) harmless.
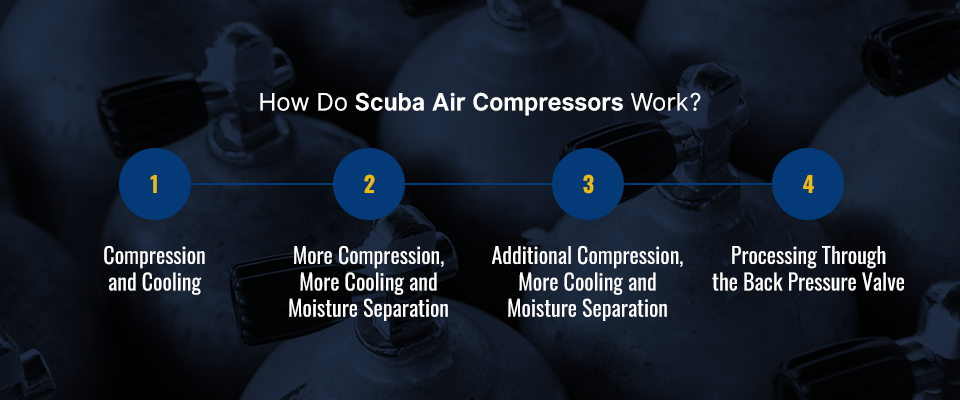
How Do Scuba Air Compressors Work?
The process by which a scuba compressor compresses air is complex, and a full explanation is beyond this article’s scope, but we will provide an overview of the four basic stages:
1. Compression and Cooling
In the first stage, the scuba compressor will take air in via its intake filter, after which it will compress the air to approximately 100 to 140 psi when pushing the air out. This process produces significant heat. This is why scuba compressors are equipped with a coil or intercooler, which helps dissipate this heat before the air continues to the next stage.
2. More Compression, More Cooling and Moisture Separation
The air, which has just been slightly compressed and cooled, now enters the next stage, whereby it gets compressed again. This time, it’s compressed to a pressure between 800 and 1,000 psi. Once this occurs, the air is then cooled again and passes through a moisture separator. After this, it is ready for the next stage.
3. Additional Compression, Cooling and Moisture Separation
In this third stage, the air is compressed even more, sometimes up to as high as 5,000 psi. After this process, the air passes through yet another cooler and moisture separator. The air may then travel through several other filters before continuing to the last stage.
4. Processing Through the Back Pressure Valve
The final step of the process involves the back pressure valve, a component that forces your compressor to run balanced. It is generally set to pressures ranging from 2,700 to 3,300 psi. This element also influences how filtration operates.
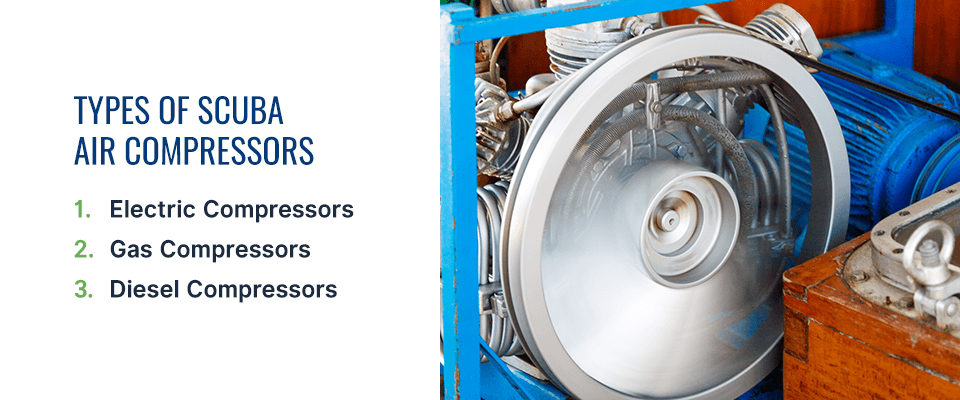
Types of Scuba Air Compressors
Portable breathing air compressors come in three categories, classified by their power sources:
1. Electric Compressors
Compressors with an electric motor are the most popular type of scuba air compressor and offer the following advantages:
- Quiet operation: Electric compressors run much more quietly than either gas or diesel models, so if you’re concerned about noise, you’ll be best off choosing electric.
- Low maintenance: Electric compressors require less upkeep than their gas and diesel counterparts.
There are, however, a few potential drawbacks for electric compressors, including:
- Limited portability: As electric compressors must be connected to a power source to operate, they’re not as portable as gas or diesel versions.
- Potential size limitations: If you only have 220- or 240-volt single-phase electricity, you will only be able to use smaller models. If you want a larger model, you’ll need to have three-phase electricity, which is usually only found in commercial buildings.
2. Gas Compressors
A gas compressor features a motor that helps the compressor run. Some pros of gas compressors include:
- Portability: Gas compressors are a great option if you need power off the grid.
- Availability: If you want a portable compressor, you’ll likely find a gas model more easily than a diesel one. If your gas motor needs to be repaired, it will also be easier to find repair technicians and replacement parts. However, in some parts of the world, diesel is the primary fuel, meaning a diesel engine may be the better choice.
- Affordability: Regarding both upfront and operational expenses, a gas engine generally costs less than a diesel model.
However, there are a few factors that may make gas compressors less desirable for some users:
- Noise: Gas compressors make more noise than electric ones, although they are quieter than diesel compressors.
- Maintenance: To keep a gas compressor in top shape, you’ll need to perform a fair degree of regular maintenance tasks and buy several fuel additives.
- Carbon monoxide emissions: Gas motors emit carbon monoxide, which must be kept away from the compressor’s intake. This is so the CO will not degrade the filter or make its way into the breathing air. To do this, you must use the air intake tube provided by the manufacturer and place the engine’s exhaust downwind from the tube.
3. Diesel Compressors
The third type is the diesel engine compressor, which is similar in many ways to the gas engine but also notably different in some respects.
Here are a few advantages you can get from using diesel engine compressors:
- High-quality, durable components: Diesel engines generally consist of high-quality parts that last longer than ones in gas engines.
- Easy portability: Like gas compressors, diesel engines don’t require an electric connection, meaning you can take them to more places.
- Potentially greater availability: If you live in a region of the world where diesel is more common than gas, you’ll likely want to select this type of air compressor.
Below are a few considerations that may make some buyers think twice about diesel:
- Noise: Diesel engines are loud — even more so than gas models.
- Weight: Diesel compressors are bulky and heavy, which can negatively affect their portability.
- Price: Diesel engines cost more than gas versions concerning both upfront cost and maintenance.
Different Pressure Levels in Scuba Air Compressors
In addition to their power sources, scuba air compressors can also be categorized concerning how much air pressure they provide:
1. Low-Pressure Compressors
Low-pressure compressors weigh relatively little and are used for surface supplied diving. These compressors are put in flotation rings that float on the water’s surface, and they supply underwater divers with air via a hose.
2. High-Pressure Compressors
Compressors categorized as high-pressure provide air pressures between 3,200 and 5,000 psi. They’re commonly found in commercial diving, and dive shops use them as well. They tend to be bulkier and heavier than their low-pressure counterparts, but they are undoubtedly better for filling tanks.
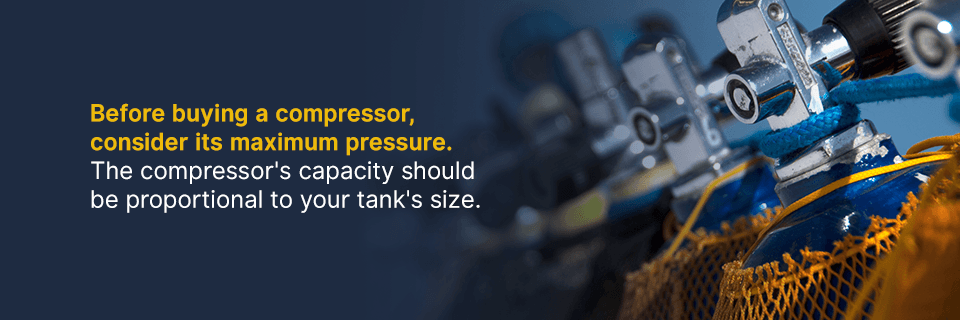
Before buying a compressor, consider its maximum pressure. The compressor’s capacity should be proportional to your tank’s size. Smaller tanks, for instance, may struggle with high-pressure compressors, whereas low-pressure models might not compress the air sufficiently in a large tank.
Oil-Free vs. Oil-Lubricated Scuba Dive Compressors
A third distinction concerning the different compressor classifications is between oil-free and oil-lubricated air compressors:
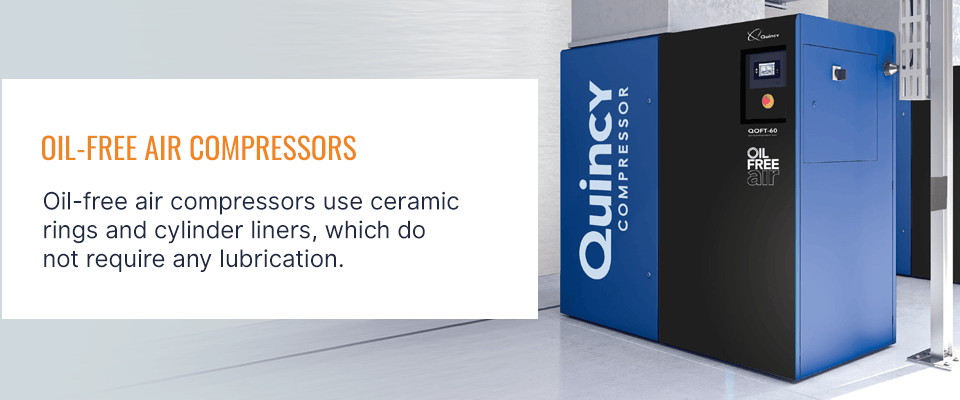
1. Oil-Free Air Compressors
Oil-free air compressors use ceramic rings and cylinder liners, which do not require any lubrication. The major advantage of this compressor type is that, as there’s no oil, there’s no risk of this fluid contaminating the breathing air. However, oil-free compressors cost significantly more than oil-lubricated ones.
2. Oil-Lubricated Air Compressors
Oil-lubricated compressors are more common and cost much less than oil-free models. These machines use oil to lubricate their moving components and cylinders. Of course, this means that, if the oil comes in contact with the breathing air, there will always be at least a tiny amount of oil coming out of the compressor with the air. This is referred to as oil-carry-over. Although the amount is small, this oil needs to be removed, which is accomplished with specialized filters.
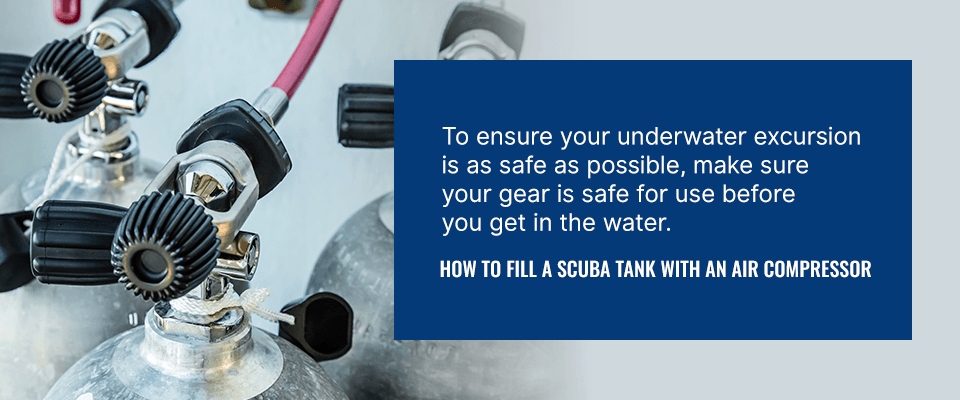
How to Fill a Scuba Tank With an Air Compressor
To ensure your underwater excursion is as safe as possible, make sure your gear is safe for use before you get in the water. When ensuring your safety, the first thing you should do is refill your tank. To do this, follow these steps below:
- Check your tank’s compliance. A scuba tank, just like any other pressurized tank, has to be inspected regularly. If your tank hasn’t been tested recently or is just too old, refrain from using it. It could be faulty, which could have disastrous consequences during filling up the tank or diving underwater.
- Release any excess air. If there’s any air remaining in your tank, let it out. You shouldn’t add any more air until this amount has been released.
- Inspect the tank for loose objects and damage. If your tank isn’t completely sealed, it becomes ineffective. Give your tank a spin and see if there are any holes or cracks. Shake your tank to see if you hear any debris or water inside. If there’s any sloshing water or rattling, you should discard your tank right away. This step is vital because if there’s a leak, and you don’t discover it until you’ve started your dive, it could be too late.
- Place your tank in cold water. This action prevents your tank and the air inside from expanding due to heat. This step will help minimize the risk of your tank exploding in front of you. Moreover, by submerging it in water, you’ll more easily spot cracks and holes, as air bubbles coming from the tank’s sides will indicate a compromised surface.
- Set your compressor up. Before you can use your compressor to fill up your tank, you need to configure it for your tank. This means checking all the required meters and gauges and ensuring everything is correct. Also, check that your automatic shutoff is in working order.
- Attach your yoke. This step is simple but crucial — attach the compressor’s yoke to your tank’s valve. Closely inspect each component’s connecting points and make sure they’re free of debris and dirt.
- Fill your tank. Turn on your compressor and let it fill your tank up. Keep a close eye on the gauges, ensuring your automatic shutoff continues working properly. If it malfunctions, you’ll need to turn your compressor off yourself.
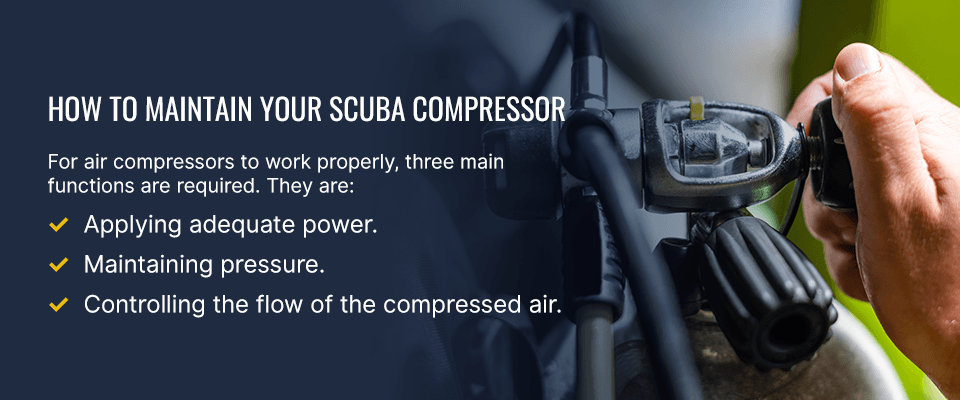
How to Maintain Your Scuba Compressor
Properly maintaining and fixing your air compressor is important, and failing to do so can lead to an explosion.
For air compressors to work properly, three main functions are required. They are:
- Applying adequate power.
- Maintaining pressure.
- Controlling the flow of the compressed air.
If your compressor stops working, it is likely due to the failure of one of these three functions above. In this section, we’ll share some useful DIY fixes you can perform yourself. Be aware that if you have a high-pressure compressor and your tank has been damaged, the compressor could rupture. Do not attempt any complex repairs — leave those to the professionals instead.
Here are some things you can do on your own to ensure your compressor’s safe operation:
1. Adjusting Air Flow
To adjust the air flow, follow these steps:
- Remove the cover. Remove the plastic cover from the compressor’s top by taking out the screws. Then, lift off the cover, which will give you access to the screws on your pressure maintaining valve.
- Remove screws underneath the cover. There will be two screws, one of which is for turning off the compressor. The other turns it on.
- Check your compressor setting. Turn on your compressor, turn it off and then check its setting. You can adjust the pressure using the upper screw.
- Adjust the pressure. To raise the compressor’s pressure, tighten the screw. If you want to reduce the pressure, loosen it. Then, engage your pressure release valve, noting what the pressure is once the compressor comes on.
- Adjust the setting. Using the lower screw, adjust the setting. When you arrive at the right pressure, replace the cover and screws removed in steps one and two.
2. Restoring Power
If your compressor has lost power, follow these steps to restore it:
- Begin with the obvious. Before doing anything else, make sure your compressor is plugged in fully and your switch is flipped on.
- Reset the compressor. If this doesn’t work, press your reset button. This should be a round black or red button typically found on the side where the motor is, usually by your power cord.
- Examine the cord. Make sure your power cord isn’t damaged.
- Plug it in somewhere else. Try plugging your compressor into a different socket. Make sure the plug’s circuit breaker is tripped. Then, turn off the breaker and turn it back on again.
- Plug another device into the outlet. If you’re still not successful, see if the outlet works by plugging another device in. If it works for the other device, this most likely means the problem is not something you can fix yourself. Have a professional examine your compressor.
3. Repairing a Leak
If your compressor is leaking, take the following steps:
- Unplug its components. Start by unplugging all the hoses and tools. Then, turn on your compressor so it can start charging.
- Spray soapy water on the compressor. Make a soapy water solution and pour or spray it all around the compressor’s fittings. Look closely to see if any bubbles form. If bubbles form, this means there’s a leak.
- Turn off the compressor. Shut your machine off, and let the pressure out from your tank as well.
- Apply tape on fittings. Remove the fittings where bubbles formed and apply tape — preferably Teflon tape — on the fittings’ threads. Then, put them back on, tightening them down.
- Turn compressor back on. Turn on your compressor and let it charge again.
- Spray soapy water once again. Perform the same test as in step two. If there are still bubbles, turn the compressor off and repeat steps three through five.
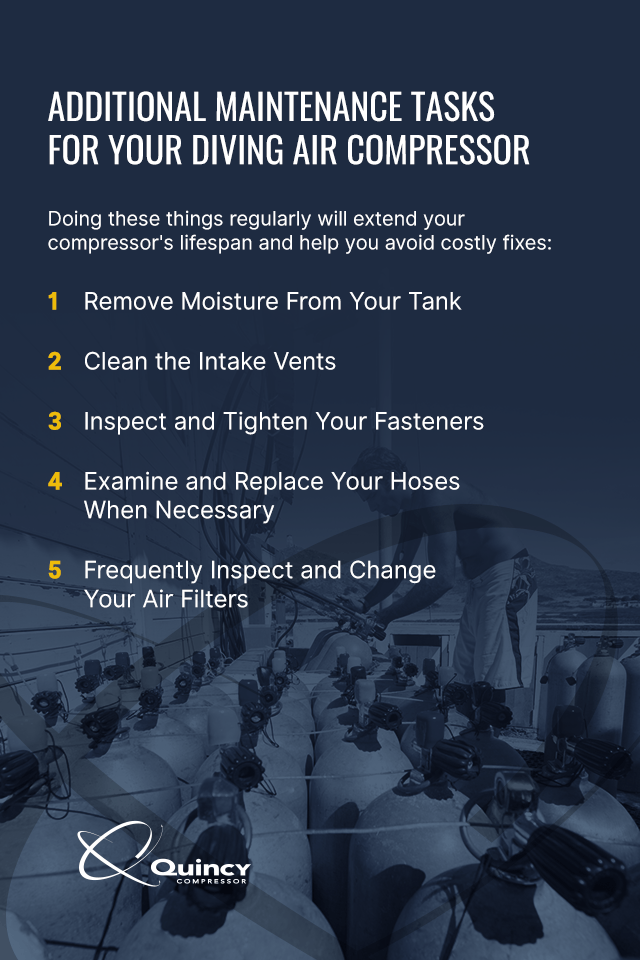
Additional Maintenance Tasks for Your Diving Air Compressor
In addition to simple repairs, we’d also like to share five routine tasks you can perform to keep your compressor in top shape. Doing these things regularly will extend your compressor’s lifespan and help you avoid costly fixes:
1. Remove Moisture From Your Tank
One important task you should perform regularly is removing moisture from the tank. This tank tends to create moisture when operating.
Compressors usually come equipped with a valve specifically designed to remove this moisture. It is essential to use it after every use, as failing to do so can lead to problems. Before using the valve, however, don’t forget to release the pressure in your tanks first.
2. Clean the Intake Vents
If the intake vents on your compressor are dusty, it will cause your machine to overwork. In turn, forcing your compressor to overwork will usually lead to a complete system failure. The time you take to clean these vents pays off later in the form of increased efficiency.
3. Inspect and Tighten Your Fasteners
You may have noticed that, when air compressors run, they vibrate a lot. Over a long period, vibrations cause your fasteners to loosen, which is why these components should be regularly checked and tightened. Neglecting this task can cause serious damage to your compressor.
4. Examine and Replace Your Hoses When Necessary
The hoses serve as some of your compressor’s most vital parts. But keep in mind that the greater the length of these hoses, the more likely they are to malfunction. Inspect them routinely to catch issues before they do serious damage.
It is crucial to invest in high-quality compressor hoses. If you skimp on quality to save money, this will usually backfire on you.
5. Frequently Inspect and Change Your Air Filters
Yet another task you should regularly perform is to inspect and change the compressor’s air filters. If debris makes its way past these filters, the compressor may shut down.
Routinely evaluating your filters is also a good way to find out how they’re holding up. Air filters covered with debris should be replaced immediately.
Browse Quincy’s Wide Range of Air Compressors
At Quincy Compressor, you get more than just industry-leading air compressors. You’ll also benefit from our many years of experience in operating and designing efficient compressed air systems. You can find many of our products, including our rotary screw compressors, in some of the most critical and demanding installations. Thousands of industries depend on our compressors for reliability and quality.
Our compressors also come with comprehensive warranties, including ones with extended coverage lasting up to 10 years for certain machine components. To learn more about our compressors, you can browse the products on our site or speak directly with a representative.
Table of Contents
- Regular Air Compressor vs. Scuba Air Compressor
- How Do Scuba Air Compressors Work?
- Types of Scuba Air Compressors
- Different Pressure Levels in Scuba Air Compressors
- Oil-Free vs. Oil-Lubricated Scuba Dive Compressors
- How to Fill a Scuba Tank with an Air Compressor
- How to Maintain Your Scuba Compressor
- Maintenance Tasks for Your Diving Compressor